Today I’m sharing a craft a little outside of my usual. This Stuffed yarn wrapped Christmas tree is a bit too tricky for young children but is a craft I’ve always enjoyed making myself and wanted to share. This craft is perfect for making whilst snuggled up with a hot chocolate and a Christmas movie!
Glue 3 of your sticks together in a triangle shape. Then, cut the fourth stick in half and glue one half to the bottom of your triangle to make the tree trunk.
Take one end of your yarn and tie it in a knot around your tree frame.
Now it’s time to start wrapping the yarn around your Christmas tree! You need to pull the yarn tight on the first loop. Don’t worry about the corners on the first trip around, they’re easier to place on the second lap and this prevents them from being too thick.
loop your string round a second time, this time including corners. to make the corners easier I usually wrap one side to the middle and then bring the other side in to meet it. you will need to wrap the string a little more loose this time to prevent it separating the first layer and creating a gap.
Do a third wrap around to even out your Christmas tree. Then, to secure your tree either thread the loose end under your previous loops or use a glue gun to secure it at the back.
To make the loop to hang your decoration; take a length of string or yarn and thread one end under the wrapped yarn at the top of your tree. Tie the two loose ends together.
Take a length of your green yarn. attach it to the tree by tying it on or by using a glue gun. Then repeatedly wrap the yarn around your triangle horizontally to create a cage for your pom poms, make sure the rows are close enough together that the pom poms won’t fall out. secure the loose end as before.
Stuff your tree with pom poms by squeezing them in through the cage. Cut out a card star and stick to the top of your tree. Finish off by hanging your fab new decoration!
Did you enjoy this Stuffed yarn wrapped Christmas tree craft? why not check out my wooden spoon angels?!
Can you believe it’s only 9 weeks until Christmas? Where on earth has that time gone?! We don’t generally put our decorations up until the first of December but we love to have as many handmade ones as possible. We recently collected some pinecones and have slowly been turning into decorations for my sons tree. This pinecone Christmas tree ornament is probably my favourite so far purely because it is so simply and fun, whilst I did use a glue gun to make mine, my preschool aged son made an absolutely fab one all by himself using Pva glue (I did use my glue gun to attach the ribbon)! They really are a fun craft for children and adults alike.
You will need
A Pinecone Green paint Paintbrush Small pom poms 1 Regular yellow/gold Pom Pom Glue gun or Pva glue Ribbon
To start making your Christmas tree; coat your pinecone in a layer of green paint and allow to dry.
Use your glue to attach your little multi-coloured Pom Poms to the ‘branches’ of your pinecone tree. These will be your tree decorations!
Glue your large yellow/gold Pom Pom to the top of your pinecone, this will be your star. Your pinecone Christmas tree is finished! If you wish to hang your ornament check out the next step to see how.
To hang your ornament; take a length of ribbon and tie it into a loop. Use your glue (a hot glue gun works best) to glue the knotted end of your loop into the top of your pinecone between branches. Then place a dab of glue onto your star Pom Pom and secure your ribbon there too .
Your tree is finished! How sweet do these little decorations look? They make fab gifts for family and friends too!
Did you enjoy this Pinecone Christmas tree ornament? Why not check out my Pinecone Penguin ornament?
This year my son is upgrading from a little tree in his room to a full size one. we like to decorate his tree in handmade decorations and we don’t have a huge amount from last Christmas so we’ve started crafting extra early this year. We decided we wanted to make something Penguin and i’m chuffed with how cute this little pinecone penguin ornament turned out. We will definitely be going pine cone hunting again, just so we can make more of these cuties for the tree and for gifts from my little person to family!
You will need
1 Pinecone White paint Paintbrush 1 Black Pom Pom Small piece of black. yellow and orange card 2 Googly eyes Ribbon Glue gun or Pva glue.
To start making your penguin, take your white paint and brush it over the edges of your pinecone. Once dry, use glue to attach your black Pom Pom to the top of your pinecone – this will be his head!
To make your penguin’s face simply glue to your Pom Pom two googly eyes and a folded yellow diamond shape for the beak.
Next, take your black card and cut out two wing shapes. From your orange card cut out two little feet. Now glue all the pieces into place.
Your penguin is now finished! if you wish to hang your penguin as a decoration then check out the next step.
To be able to hang your penguin ornament; cut a length of ribbon, fold it in half and tie a knot. Use a hot glue gun or a generous amount of PVA glue to attach the ribbon in one of the gaps at the back of your penguin.
And that’s it! Your super simple pinecone penguin ornament is finished! How sweet do these look! I really do love penguins!
I know I should probably be uploading Halloween crafts this week but all the Christmas goodies popping up in shops and Christmas movies being shown on tv are making me feel extra festive! I Can’t wait for Christmas with our little ones this year. The first thing we usually start making at Christmas is the cards, just so that we have plenty in lots of different designs. This woven paper Christmas tree design is one of my favourites, its great for practising motor skills and hand eye co-ordination and it looks really sweet too!
You will need:
Light green paper Dark green paper Yellow paper Brown paper Sellotape Scissors A folded piece of card (Optional)
To start, take your green paper and cut out the triangle shape of your tree.
Now, take the bottom part of your triangle and fold it around a cm up. Take your scissors and make little snips in the paper evenly spread about 1cm apart.
open up the fold and extend the snips to fit your Christmas tree. Try to make sure you don’t cut open the edges of your tree. If you do however, don’t worry you can just secure it with Sellotape!
Take your dark green paper and cut it into strips. Individually thread the strips into your Christmas tree following an under, over pattern.
Secure the strips down on the back of your Christmas tree using Sellotape. If your strips overhang on the front of your Christmas tree; simply fold the strips over the sides of the tree and secure with tape.
Use your yellow and brown paper to cut out a star and a tree trunk, glue them into position.
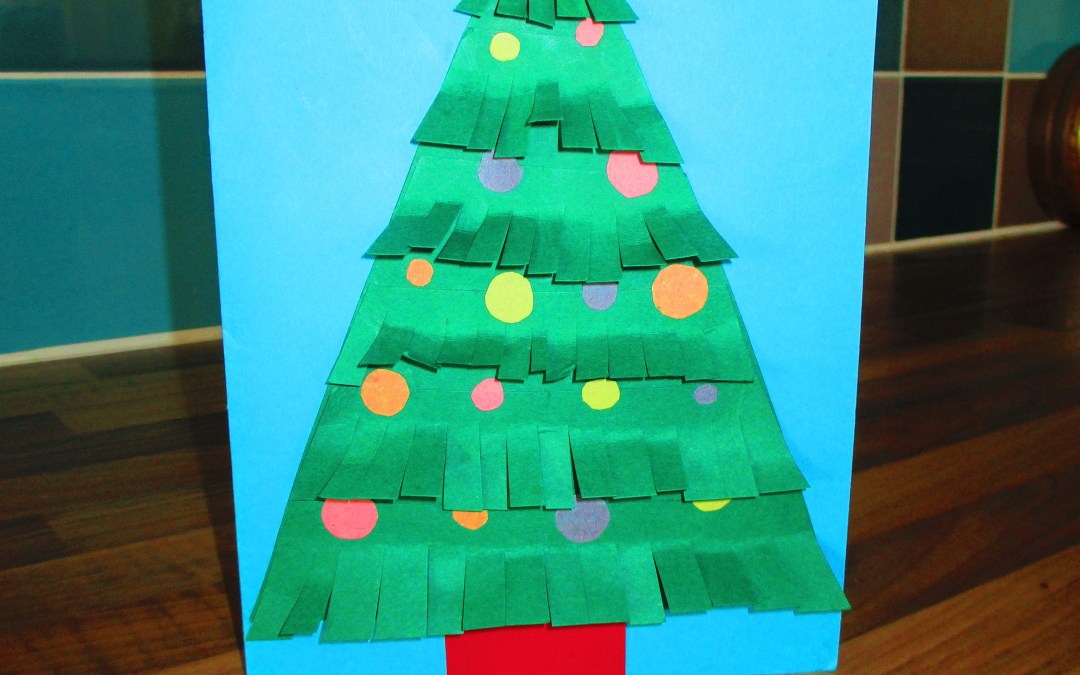
Can you believe its just under 10 weeks until Christmas? where has that time gone?! I haven’t uploaded many crafts lately as my two little people have been under the weather. So, prepare yourself for some last minute Halloween craft ideas and a sleigh load of Christmas ones too! I love this Snipped Christmas tree card, not only does it look super sweet but its fun for little ones to make too; My son loves any crafts that involve using his scissors – they make him feel all grown up and he enjoys the challenge of trying to follow lines.
You will need
1 sheet blue card 1 sheet green card Yellow paper Brown paper Scissors Glue stick Multi coloured paper to decorate
First, take your piece of green card and fold it in half.
Use your pen to draw a triangle Christmas tree shape on the front of your card. Your tree will need to be around 3cm shorter than the height of your card. This is so that when you mount it you will have space to stick your star and tree stump!
Take one of your triangles and glue it on to your folded background card.
Note: you can see I positioned mine high on the card. I had to move it down later on to add my star. Try and leave a 1cm gap between the tip of the tree and the top of the card.
Cut your second triangle into 5 or 6 strips.
Take your scissors and make snips about two thirds of the way up each strip. Make sure you don’t accidentally snip too far as it can be tricky sticking the pieces back together. A great way to avoid this is to draw a line on the back of the paper for your little one to cut up to.
Now you need to stick your strips down onto your first triangle. Apply glue to the belt of the strips and position them in their matching place on the tree. By flattening the snips down you can check that the pieces are just touching; but not overlapping. ting from the bottom is easier. Be sure not to glue the snipped pieces.
To make your Christmas tree come to life, cut out a yellow triangle for the top and a red or brown rectangle for the stump and glue them down
If you wish to add some decorations to your tree; simple cut out some multicoloured circles and stick them to the flat parts of your tree.