Handmade fishing jacket card

Handmade fishing jacket card
Ok ok, so this craft doesn’t really fit in with our recent theme of quick and simple. Sometimes though, it’s worth putting in a little extra effort to show some appreciation for a loved one and this little handmade fishing jacket card is pretty cute! My son and I made one for a family members birthday, hes really big into fishing, it’s not really my thing but my partner is in to it aswell so we made him one ready for fathers day too. It might only be April but you can never be too prepared (says me who’s always forgetting and having to panic buy presents the day before)!
You will need
- Coloured card (we used; green, brown and black)
- Coloured paper (we used; white, blue, orange, beige, red, pink, grey and green)
- String
- Scissors
- Glue
- Pen
- Googly eyes

First you’ll need to take your piece of coloured card. Putting it in a landscape position fold each side in to meet at the centre.

Draw on two small arches to make the sleeve section and then cut them out.

Take the upper inside corners of your jacket and fold them outwards to make a collar.

Next cut out four pocket shapes from your chosen colour.


Now you’ll need to make the contents of the pockets! Start off by cutting out two little arch shapes. Cut a triangle out of the curved side of each one and give each a googly eye to make your fish. Glue your pocket to the front of your fish so that they look as if they are sticking out the top.


Cut out two shiny hook shapes as you can see above and again glue a pocket to the front of them


Next you’ll need to make a float. Cut out a white circle and then draw around it on some coloured paper. Cut out this second circle and then cut it in half, glue one half of the circle down onto your white circle so that is half white half coloured. Then, from the other half cut out a small square and glue it down on the centre of the white edge to make the top of the float. Glue your third pocket down on the front of your float


For the final pocket cut out the shape of a worm. Then either using a pen or paper strips give your worm some stripes. Finish him off by giving him two googly eyes and a smiley mouth, then again glue the final pocket down on the front of him.

Glue your pockets down in place on the front of your jacket. Then, take a pen and write a name tag for your jacket, cut it out and glue it down in place near the collar. The basic shape of your fishing jacket is finished! If you want to add a little fishing rod carry on to the steps below.
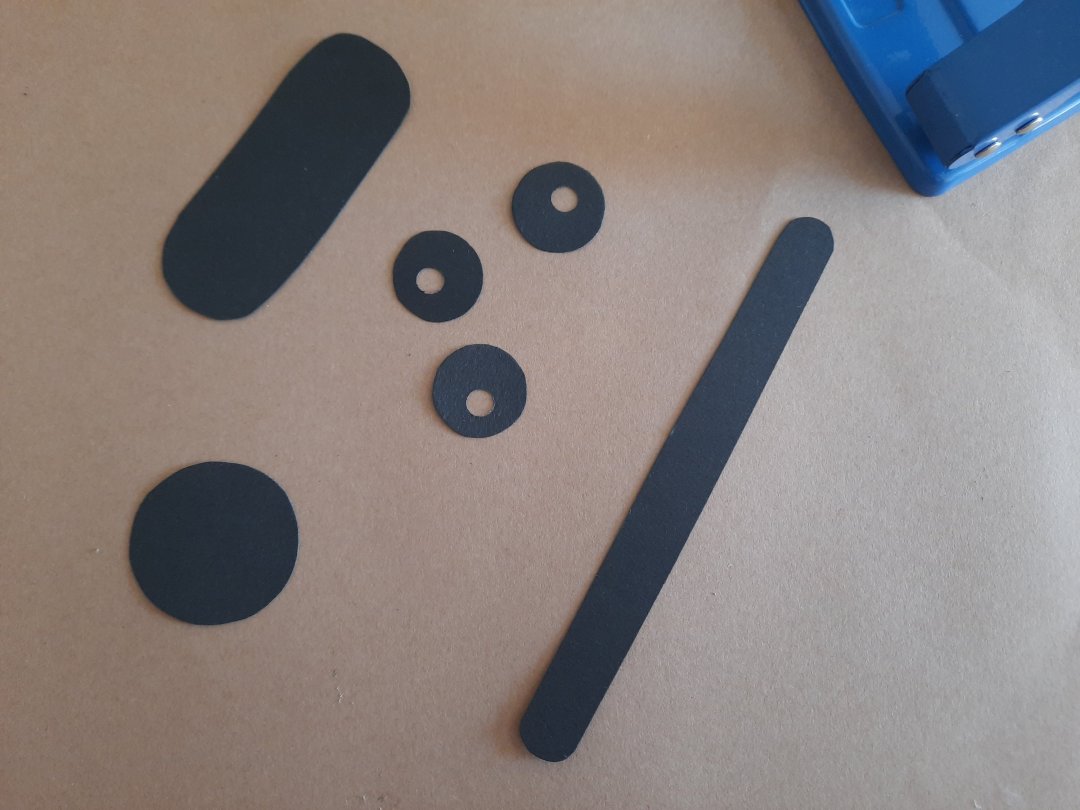
Start off by cutting out the basic shapes of your rod. You will need a black oval for the handle, a rounded strip for the body, a large black circle for the reel and three smaller circles with punched holes for the rings.

Glue the body of your rod onto your handle. Space the three rings evenly across the body. Remember to make sure that the holes are not covered so that you can still thread your string through them.

Glue your string down onto your handle and then cover it over with your remaining reel circle. Then, weave your string in and out up through the rings as you can see above.
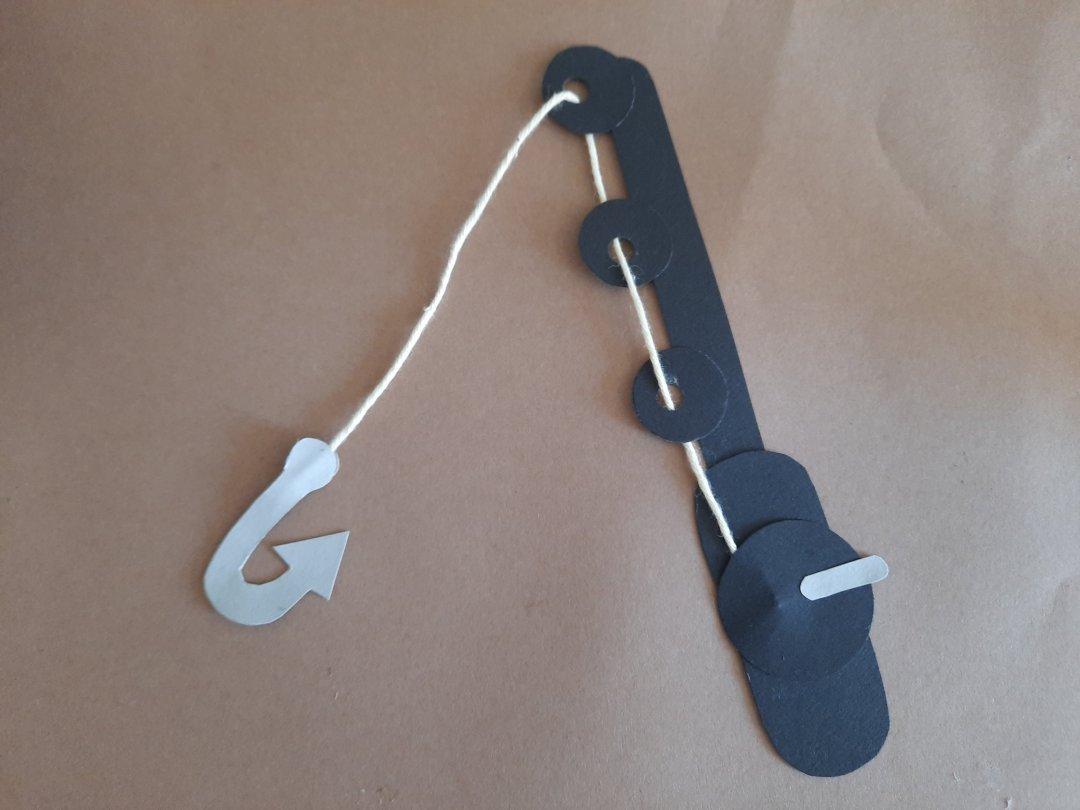
Cut out two identical hooks by folding your paper in half when cutting. Glue one hook to the front of your string and then match up the other in place on the back. Finally, cut out a small strip and glue it down onto your reel.l to make the reel handle.

Add the rod to the side of your card..

And finish off by adding your message to the inside. Isn’t it adorable? I think it was well worth the extra effort!
Did you like this handmade fishing jacket card craft? why not check out this awesome space rocket card!
[recent_post_slider design=”design-4″]