

Popsicle stick Christmas tree ornament

These cute popsicle stick Christmas tree ornaments are so simple and easy to make and the look fab hanging on the Christmas tree too!
We just love how bright and colourful these look when they’re covered in Pom Pom baubles but you could decorate yours with anything you like! We love to see your creations, you can share them with me on social media; you can find the link to our Facebook and instagram at the bottom of this page.
Here’s what we used
- Popsicle sticks
- Acrylic paint pens (paints will work great too!)
- Pom poms
- Glittery foam
- Ribbon
- Scissors
- Glue/glue gun
How to make our popsicle stick Christmas tree ornaments.

Start by taking your popsicle sticks and cutting them to the sizes that you can see above. You’ll need two full length sticks and one stick just over half the size with the ends cut to make the tree and an end section of stick to make the trunk. Then use your paints or markers to colour in the sticks before popping them aside to try.
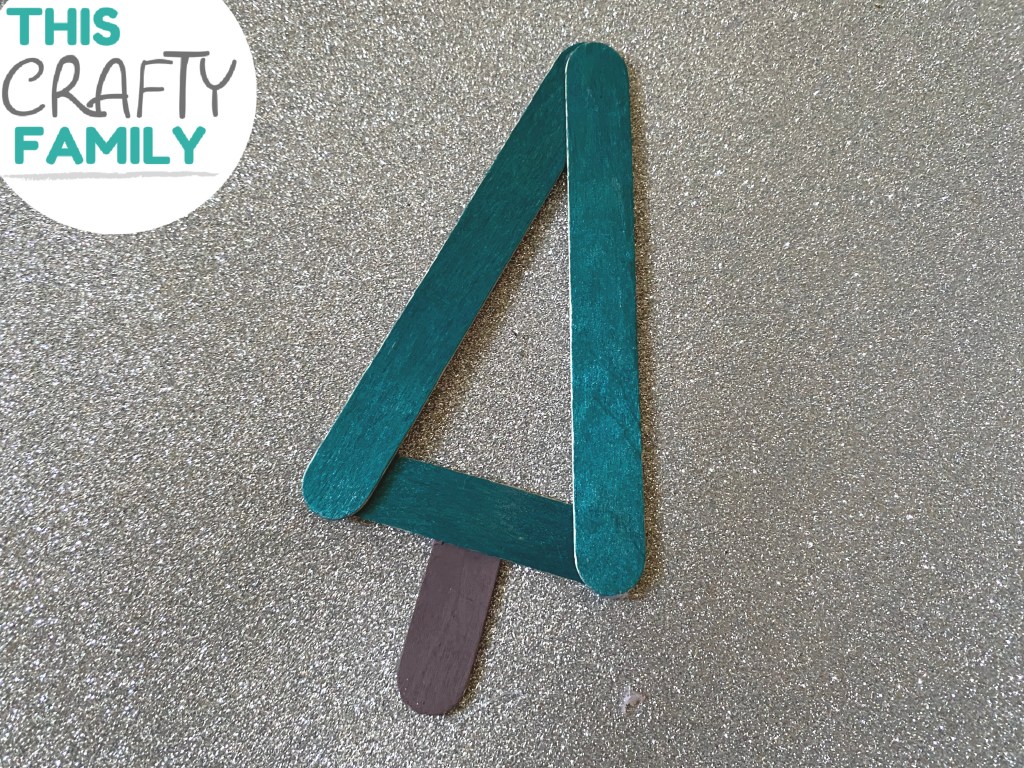
Once your sticks are dry take the two full length ones and glue them together in a point, glue the shorter stick across the bottom to make the triangle shape of the trees and then finally add the final stick at the bottom to make the trunk.

Next decorate your popsicle tree ornament, we used colourful Pom Poms to make baubles but you can use anything that you like!

Cut out a glittery star for the top of the tree and stick it down in place

Finally tie a length of your festive ribbon into a loop and glue it down on the back of your ornament so that it can be hung on the tree. Once dry your ornament is ready to display! Aren’t these just the sweetest?


