It’s time for another paper cone craft! We’ve had so much fun making them today and next i want to share with you these lovely paper cone princesses. We’ve made quite a few and tried to come up with several different designs for them, these ones in the picture are our favourites though. Our princesses are all fictional characters but you could even suggest that your child tries making themselves to make this little craft even more fun!
You will need
Coloured thick craft paper or card
Eye stickers (optional)
Decoration bits and bobs (optional)
Scissors
Glue
To make the dresses
Take a coloured piece of A4 paper and fold it in half to make a card shape. Then, take a pencil and draw a gradual curve starting from just above the centre of your fold line to the bottom right corner (you’ll need to make sure the curve isn’t too sharp or it won’t match up when folded). Cut out your shape.
Fold your shape in half and trim off any excess to make sure both sides are even.
Open up your shape to reveal your 4 sections Cover one of your end sections in glue..
and then pull it round and stick it down on the back of your other end section to create a triangular cone shape for the dress.
To make the face and arms
Start off by cutting out a circle for the face and an egg shape for the hair.
Glue the face piece down onto the hair and then cut the hair into your chosen style.
Now to give your princess a face starting with two eyes. We used eye stickers but if you dont have these you can simply cut out two white circles and draw on the details with a black marker. Then, glue down a mouth and two rosy blush circles on her cheeks.
To finish off the head, cut out a shiny crown and stick in place at the top of her head.
To make the arms, cut out two rounded strips and roll one end of each up slightly.
Glue your princesses head down in place at the top of your cone shape and then use the flat piece of your arms to attach them to the triangle on either side of the face. Your super cute paper princess is finished! Why not add some decorations to her dress or crown to make her even more unique!
How adorable is this cute paper penguin craft?! My little guy and i loved them so much that we made ourselves a little penguin family! We’ve had so much fun making these little cone crafts and have came up with so many fun designs to share with you all. I’m sharing this one first because they’re my son’s absolute favourite – which is no surprise as he loves animals of all kinds!
You will need
Thick construction paper or card (we used orange, white and black)
Scissors
Glue
Sticker eyes (optional)
To make the body
Take a black piece of A4 paper and fold it in half to make a card shape. Then, take a pencil and draw a gradual curve starting from just above the centre of your fold line to the bottom right corner (you’ll need to make sure the curve isn’t too sharp or it won’t match up when folded).
Cut out your shape.
Fold your shape in half and trim off any excess to make sure both sides are even.
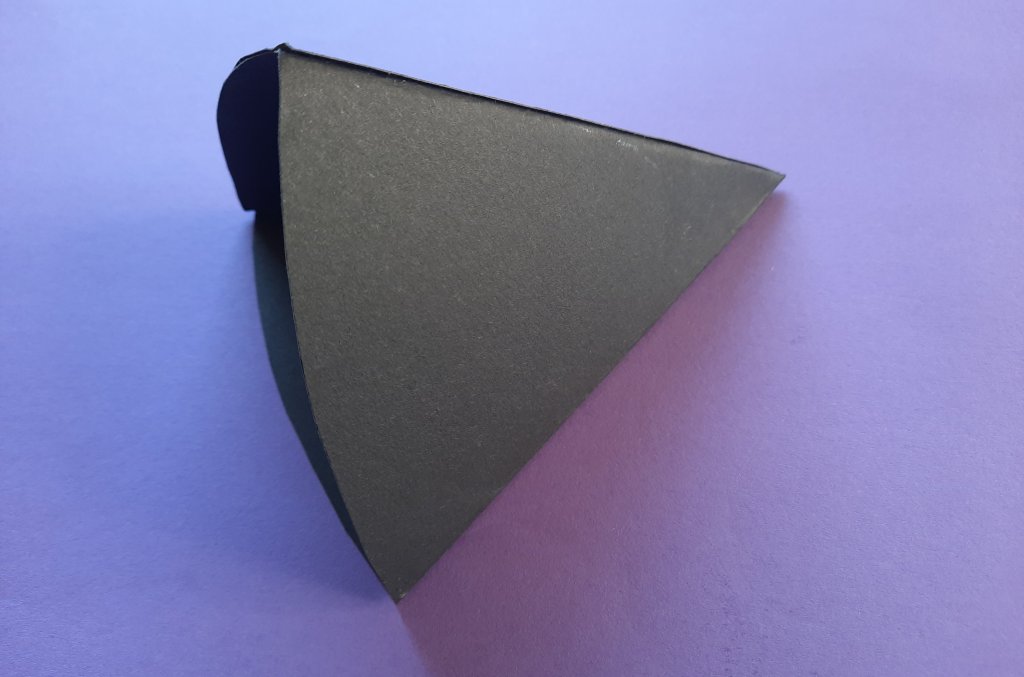
Open up your shape to reveal your 4 sections Cover one of your end sections in glue…
and then pull it round and stick it down on the back of your other end section to create a triangular cone.
To make the belly, head and flippers.
Cut out a white arch shape and glue it down centrally on your cone, this will make your penguin’s white belly.
Cut out a black circle for the head. Now you’ll need to give your penguin two eyes. We used eye stickers but if you don’t have these you can simply cut out some white circles and draw on the eye details. You’ll also need to stick down a beak, to make it, simply fold a piece of orange paper in half and using the fold line as the base cut out a triangle to give you a folded diamond shape. Glue one triangle half down on the face and leave the other half free as you can see above.
Next cut out two flipper shapes
and curl one end around a pencil.
The final feature that you will need to make is the feet. Make sure you leave enough room at the back of the feet to fold a tab that you can use to glue them on you penguin – just like you can see above!
Now it’s time to glue all your pieces together! Glue the head down at the top point of your cone. Add a flipper to each side and then using your folded tabs, secure the feet on the inside of your cone and fold them outwards. Your adorable penguin is finished!
There might be an influx of unicorn crafts over the next few days, my unicorn mad niece came to visit a few weeks back and we spent hours sat making all different unicorn crafts. After a busy couple of weeks I’ve only just managed to start to sort and upload them. I really love these Simple unicorn corner bookmarks, they look gorgeous and were easy enough for her to make all by herself too. In fact like with many of the crafts we make – i now have a whole herd of them that’s she’s made to go in our books! If you have 5 minutes to spare, why not give one a go?
You will need
Coloured paper or card
Black marker
Scissors
Glue
First of all you will need to fold your origami corner bookmark. If you haven’t made one before you can find a photo guide on how to make your own here.
Now you’ll need to cut out the shapes to go on the unicorns head. Using the same colour as your bookmark; cut out two ears. Then use some coloured paper to cut out two smaller inner ears and a unicorn horn.
Next you’ll need to give your unicorn two eyes, we use eye stickers but if you don’t have them you can simply cut out two white circles and draw the details on with a marker. For the nose, cut out a coloured oval and optionally add a mouth or some nostrils. Glue the eyes and nose down.
Cut out two little circles and glue them down to make two rosy cheeks. We used a hole punch to punch out two perfect little circles. Your unicorn bookmark is finished! Don’t they look fab?!
Is it just me or are unicorns a “thing” right now? They are everywhere you look and my little niece is absolutely obsessed with them! I must admit when she came over on the weekend and asked to make ‘loads of unicorn crafts’ i was a bit stumped. Unicorns are not something my son has really ever been interested in so it was a bit of a challenge to come up with some fun crafts for her to make. We got there in the end though and i absolutely love this accordion paper unicorn craft!
You will need
Thick white paper OR White Card
Coloured paper
Marker pen OR googly eyes
Scissors
Glue
How to make this Paper unicorn craft
First you will need to cut out a circle for your unicorn’s head. Then, cut out two horseshoe shapes to make the legs and body. You’ll need to make sure the legs are equal shape/size, the easiest way to do this is to fold you card in half and cut out two at once or cut one out and draw around it.
Now to cut out the shapes for your unicorn’s face/head. You will need two outer ears, two slightly smaller inner ears, an oval nose and a unicorn horn.
Glue the pieces down in position on the circle head piece.
Give your unicorn two eyes and then you’ll need to make your mane and tail. We did this by cutting out and gluing down some coloured strips but alternatively you could use markers to draw them on.
Next to make your spring! Take two strips of paper and glue them together to make a right angle.
Then take turns folding each strip over the other. Once you reach the end secure the two lose ends together with glue or tape.
Glue your unicorn’s head down in place on its legs. Then stick one end of your spring down on the inside of it’s front legs and the other end down on the inside of its back legs. Your super cute paper unicorn is finished!
My little guy has always loved and been fascinated by animals. Be they land, ocean or prehistoric you can guarantee he’ll be interested. One land animal in particular that he’s always loved is the elephant and that’s what he wanted to make when we sat down to craft – some elephants to go ontop of his cupboard. We had so much fun making this freestanding card elephant craft that we made a whole herd in different sizes and colours!
You will need:
Coloured card (we used blues, pink and white)
Scissors
Glue
Black marker
To start you will need to cut out the main shape of your elephant. For the legs cut out an arch shape with two rounded feet at the bottom, then cut out a smaller arch from the inside. To make sure your elephant’s front and back legs are equally sized you may find it easier tobcut them out of a folded piece of paper. For the head you just need to cut out a circle.
Next you will need to make the shapes for your elephants head and face. Cut out two large B shapes for the outer ears and two smaller ones for the inner ears. For the eyes, cut out two white eyes and draw on two pupils. Finally cut out the curved shape for your elephant’s trunk as you can see above.
Glue your elephants head down onto the body and then add it’s ears and facial features.
Now you will need to make a papet spring. Cut out two long strips of paper and glue them at a 90° angle. Then take turns folding each strip over the other.
Once you’ve reached the end, glue the lose ends down securely.
Stick one end of your spring down on the inside of your elephant’s front legs and then secure the back legs on the other end of the spring. Your Elephant is finished! How cute are they? why not make a couple more to have a whole herd!