As a mother there is no amount of money that can buy you a gift so cherished as one made by your child. This little DIY mothers day frame is really sweet and straightforward to make and it looks great at home or on an office desk. So why not share the love this mothers day with this easy DIY craft.
You will need
Paint and paintbrush
4 thick popsicle sticks
White and Coloured Paper
Glue gun/strong glue
Scissors
Marker
Start off by painting your popsicle sticks in your chosen colours. We used light pink and light purple. When you’ve finished, pop your sticks aside to dry.
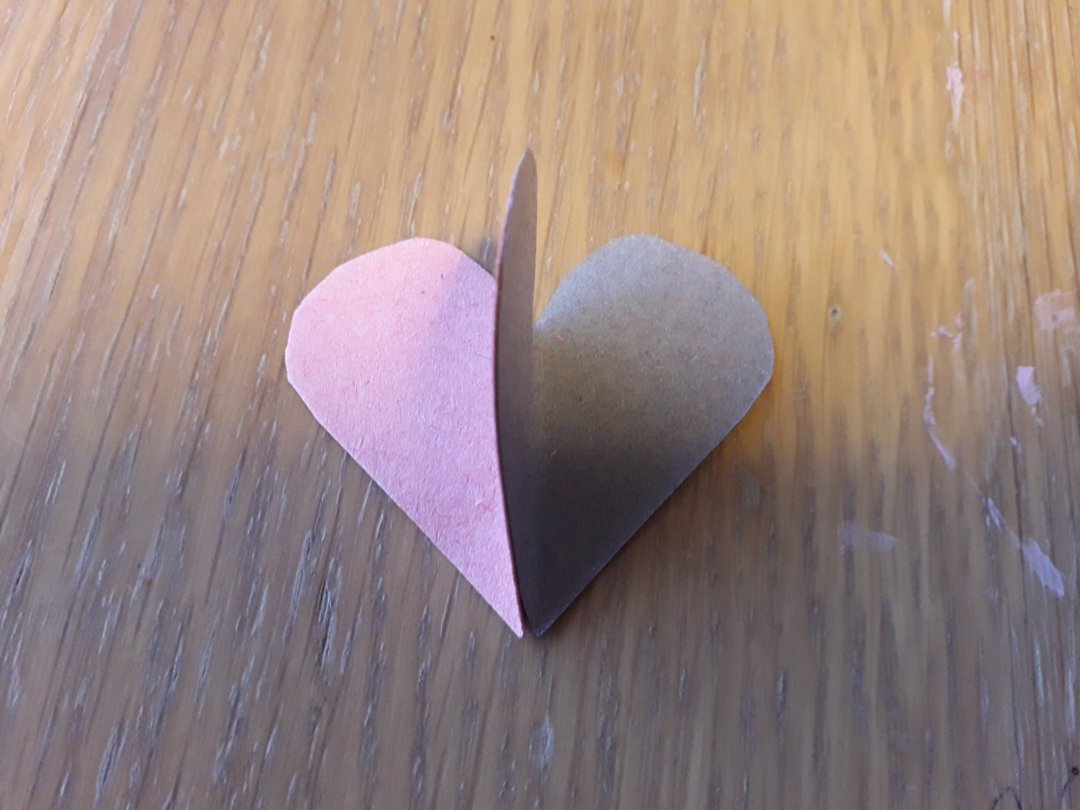
Whilst your sticks are drying you can make the decorations for your frame. To make the hearts put two coloured pieces of paper together and cut a heart shape out of them. cutting both at the same time will give you two equal size and shape hearts. Fold both your hearts In half. Glue one half of one heart to one half of the other. This should give you the t shape that you can see above. You’ll need to make two of these.
To make the daisies, cut out a white flower and then glue a yellow circle in the centre. You’ll need two daisies.
Once your sticks are dry glue them into a square as you can see above.
Add your little handmade decorations to the corners and optionally write a message on your frame. finish off your frame by cutting out a picture and gluing it to the back of your frame. Now all thats left is to do is gift your creation to a special someone!
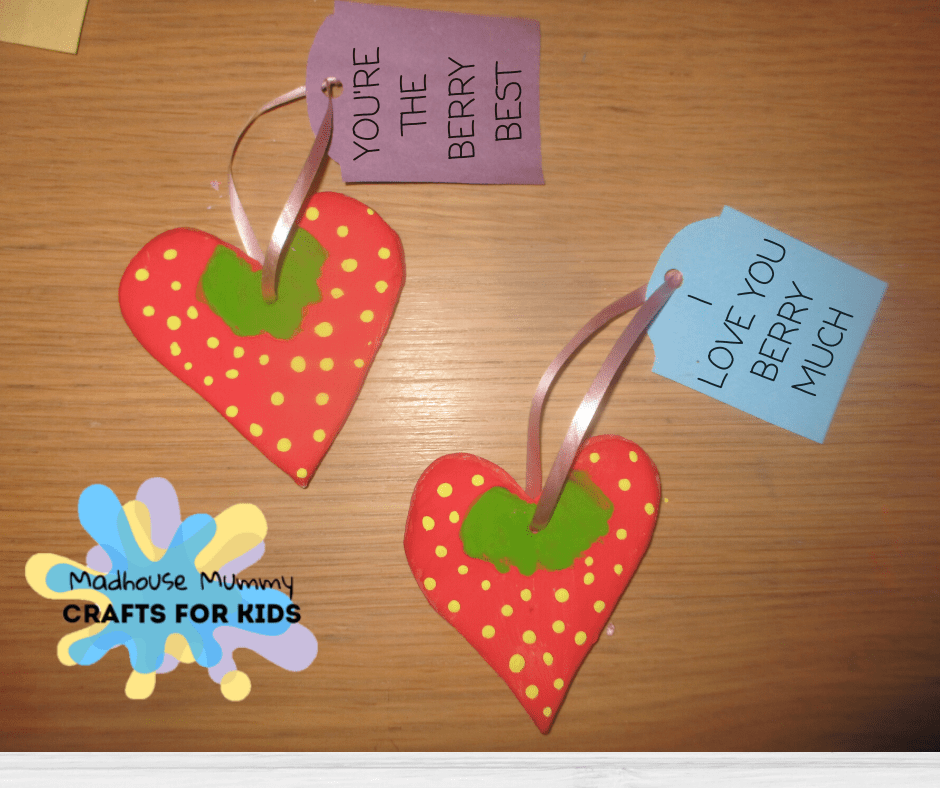
We’ve had a busy few weeks making valentines cards and gifts for my son to give to his loved ones. These little handmade berry heart gifts have been drying on our shelf for a lot longer than planned but we’ve finally got around to painting them. I think they look pretty cute and my son was really pleased with them (and himself) too! They’re really simple to make and are perfect as handmade gifts for valentines day, mothers day and many other occasions! You can use either Salt dough or clay, We used air drying clay as we have a tonne to use up but salt-dough works great too, you will just need to bake them until they are solid enough to paint!
You will need
Clay or salt dough
Red, yellow, green paint and paintbrush
Card/paper
Scissors
Knife (for cutting out shapes)
Ribbon
Hole punch
First you will need to create your heart shapes. We usually roll out our clay (or salt-dough) and then cut out a paper heart to use as a template to cut around. Once you have your heart, pierce a hole in the top centre so you can thread your ribbon through later on. If you used air drying clay they will need to be put aside for 1-2 days however if you used salt dough just pop them in the oven and bake until dried and hard.
Once dry, coat them in red paint and allow to dry.
Splodge some green paint around the top centre to make the stalk and then use the end of a paintbrush or a q-tip to dot on some yellow seeds.
Cut out your tag shape and use a hole punch to make a hole at the top. Take your chosen ribbon and thread it through the hole in your berry and then through your tag. Secure the two loose ends by tying them in a knot.
Add your special message to your tag and all that is left to do is gift your berry to a loved one!
Today we’ve been making yet more valentines crafts! This time however, we’ve used a resource that i haven’t used on this blog yet; chalk. chalk is a really fun and flexible medium and my son loves to use it both out on the pavement and for inside crafts too. It’s just such an interesting texture and style for kids. What’s great for us grownups too is how cheap chalk is, you can pick up a pack of chalk for under £1 at most supermarkets. Which makes this craft fun, easy and affordable – perfect for preschools and groups!
You will need
Coloured chalk Card paper Scissors Tape or blue tack Marker
Take your scrap piece of paper and cut it down to the same size as the front of your card (this is so that you can be sure your stencil is the right size). Fold it half and then using the fold as the centre; draw half a heart shape and cut it out to give you an equal sided heart stencil.
Place your stencil over the front of your card and secure it down with tape or blu tack. Make sure that its tightly secure so that it doesn’t move about when little one is colouring in!
Take your chalks and colour in your heart using stripes of different coloured chalks. Blow off any excess chalk and then slowly peel the stencil away. You may need to tap your card on the table to remove any remaining excess.
Finish off your chalk heart valentines card by adding your special message to the front and filling out the inside to gift to your loved one!
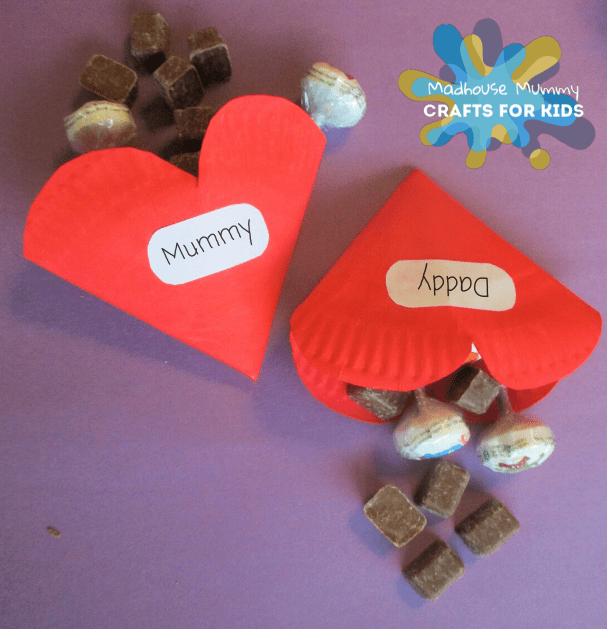
These heart shaped sweet cones are really sweet, simple and cheap to make. We love them and are planning on making a whole bunch of them for my sons class at school. All you need to do is pop a layer of cling film over them and they’re easy to transport and gift. One paper plate makes two heart cones so a pack goes a long way. Why not show loved ones how appreciated they are this valentines or mothers day with some tasty treats!
You will need
Paper plate Double sided tape Red paint & paintbrush White paper Scissors Pen
The first thing you will need to do is cut your paper plate in half. Put one half aside and take your other half to make your sweet heart cone.
Bring your two corner points together to meet in the middle. overlap the two sides slightly in the centre and secure them together with double sided tape.
flatten your cone shape so that you can cut both sides at once. Take your scissors and cut the open ends of your cone into the top of your heart as shown above.
Cover your heart cone inside and out with red paint and put it aside to dry.
Take your white paper and cut out an oval shape to make your label. Write the name of the person who you are going to give your heart to on the label. Glue in onto the front of your heart cone. Now all you have to do is fill your heart cone with yummy sweet treats!
Valentines day is the time of the year where we show those closest to us how much we love and appreciate them. For me, I think its a great holiday for children. It teaches the importance of expression and appreciation of those who deserve it. Personally I don’t think there is any better valentines gift than a handmade card; it doesn’t cost much to make and the effort that goes in to it means more than anything you can buy. This heart jar valentines is so sweet and easy to make. its great for older children to practise using scissors and as a sticking activity for smaller children.
You will need
Coloured card Coloured paper Glue Scissors Markers
To start, take your piece of card and fold it in half. Cut the shoulders of your jar in to the top of your card.
Take the paper you are going to use for the lid and cut out two equal rectangles. Glue the first to the front of your card. Now, flip your card over and line the second one up on the back. This will help weigh it out so that your card can stand easily.
Now for the fun bit! Cut out several coloured hearts and stick them down all over your jar.
To finish of your card simply add your own super cute message to the lid. All that’s left to do now is to write inside and give your card to someone special!