These cute little Pom Pom love bunnies are just adorable as little handmade gifts and the best part is that they’re super easy to make too! Whilst you can use tacky glue I’d definitely recommend an adult With a glue gun to help stick your little ones bunnies together, that way the stay safe and secure for even longer.
My little girl had so much fun making these and now has a whole pack of bunnies ready to hand out to her friends and grandparents on valentines day!
Here’s what we used
Yarn
Felt
Googly eyes
A small Pom Pom
Foam
Patterned paper
A glue gun
Scissors
How to make our Pom Pom love bunnies
Start by taking your coloured yarn and wrapping it around your fingers several times until you have a good, chunky amount stacked up.
Gently remove the yarn from you fingers. Take a small length of string and tie it across the centre of your Pom Pom ensuring that you pull it very tight.
Take your scissors and cut all the way around the edge of the Pom Pom at the centre of the loops.
Fluff your Pom Pom up and trim the scraggly ends to get it into shape.
Next take your felt and cut out a large heart shape for the feet and two outer bunny ears. Optionally also cut two inner ears from patterned paper and glue them onto the felt outer ears
Glue the feet in place on one side of the pom Pom and the ears on the other side.
Add two Googly eyes and a little Pom Pom nose to make the face.
Cut out a little strip of foam (or card), add a little heart to one end and then glue the other end to the feet of your bunny. Finally add a special message and your super cute Pom Pom bunny message is ready to deliver to someBUNNY special!
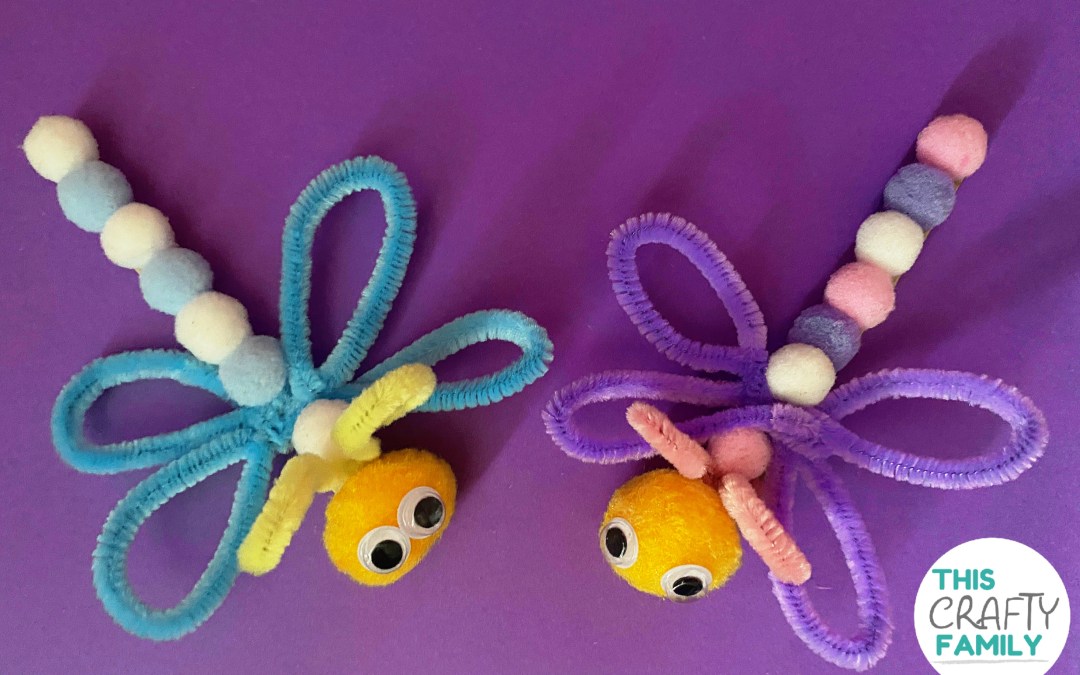
This cute summer dragonfly craft is a great activity to keep the kids busy over the summer holidays and it looks adorable too! We used a glue gun to make our little butterflies but it works with pva or tacky glue too; you just need to be a little extra patient!
Here’s what we used
Popsicle sticks
Tacky glue/glue gun/pva
Googly eyes
Pipe Cleaners
Scissors
How to make this cute summer dragonfly craft
Glue several smaller Pom poms across the length of the popsicle stick to make the body and a large one on the end to make the end. if you’re using pva or slow drying tacky glue then you will need to leave it a while to die.
Twist two pipe cleaners together in the middle to make a cross. Twist the centre of the pipe cleaners around the popsicle stick near the head and then bend each wing piece inwards and twist to secure.
Now twist another pipe cleaner around the stick at its centre and curl the ends around to make the antennae.
Glue on two Googly eyes and once dry your adorable popsicle stick dragonfly is ready to play with or display!
This super cute pom pom reindeer ornament is so simple to make and looks adorable too! it’s never too early to start Christmas crafting, We’ve had a quiet couple of days at home to try and get over a cold and to keep ourselves busy we’ve been bust trying out our new pom pom makers! i just love how this reindeer turned out and were currently in the process of making each of Santa’s reindeer as part of a cute Christmas display that we have planned. If you and your kids have go at making one we’d love to see how it turned out, did you know we’re now on Facebook? you can share pictures with us there.
Here’s what we used
Pom pom maker (optional)
Brown yarn
Brown pipecleaners
Googly eyes
Red pom pom
Tacky glue/glue gun
How to make a pom pom reindeer ornament
Start by making a large brown pom pom. If you haven’t made one before you can find a quick guide here. You don’t need a pom pom maker to make a cute pom pom!
Tie a yarn loop and glue it down into place inside the top of the pom pom
Take a pipecleaner and fold it in half to create the top antler. Twist it secure about 2-4cm from the bend. Pinch a second antler on either side and twist them together at the base to secure. Part the yarn of the pom pom and glue the antlers into place either side of the loop at the top of the head
Glue on two Googly eyes and a pom pom nose and your pom pom reindeer ornament is finished!
We use a lot of pom poms in our crafting, they’re just so much fun! We also have a basket of them on the side which the kids use for pretend snowball fights. They’re so versatile and so easy to make too, so I thought I would show your our favorite 2 ways to make perfect pom poms!
Method 1 – using a pom pom maker
Pom pom makers are our go to when we want perfect pom poms. This brand in particular is great especially when crafting with kids. They’re nice and chunky so are easy to grip and the ridges are a helpful guide as to when the pom poms are ready to snip. if you want to spend a little i highly recommend these clover pom pom makers (availabe here for our American friends) – there is a very good reason why they’re so popular!. We find that these are the best way to get perfectly round and fluffy pom poms but if you’re looking for a fast and free way why not check out method 2 – finger pom poms!
Take your yarn and wrap it around one side of the pom pom maker. Continue wrapping it around until its even all the way across. This particular brand of pom pom maker is super handy because you’ll know its ready when the ridges are totally rounded. But otherwise you can just adjust your yarn to your desired thickness – we usually do 3-4 layers when using dk yarn.
Repeat the previous step on the the other side of the pom pom maker.
Place the scissors inside the gap on the edge of the pom pom maker. Slowly snip all the way around both edges making sure you hold the pom pom maker together securely.
Take a separate length of yarn, slot it through the edge of the pom pom maker then pull it into a taught knot. Bring the two ends of yarn around to the other side of the pom pom maker and tie it into a double knot to secure.
Pull open the two arms of the pom pom maker and separate the two halves. Remove the pom pom, fluff it up, then take the scissors and trim it down removing any stray ends. Your perfect pom pom is finished! These pom pom makers are fab, we love using ours.
Method 2 – making pom poms using fingers.
Wrap the yarn several times around the middle three fingers (you can adjust the amount of fingers you use to alter the sizes).
Once you’re happy with the thickness of your yarn, carefully slip if off of your fingers and onto the table. Take a length of string and tie it around the centre of your entire yarn, flip the pom pom around and tie it on the other side in a double knot to secure.
Pop your scissors into the edge of your pom pom and slowly snip the loops open at their central point. Fluff up your pom pom.
Take your scissors and snip all around your pom pom until you are happy with it. Though the pom poms don’t turn out quite as perfect looking this way they are still super cute, plus its fast and free!
We have hundreds upon hundreds of pom poms in our craft box and we rarely ever get to use them. This is simply because we have a baby in the house who loves to eat everything and anything. Pom poms seem to have a habit of getting everywhere and like all small crafty items prove a choking risk – any parent of a baby knows the process of constantly scouring the floor for any potential edibles! However, the other day she decided have a monstrously long nap. So, my son and i decided to have our own pom pom making party. We had loads of fun and came up with loads of super cute pom pom pals but this pom pom ladybug pal was our firm favourite!
You will need
1 Large red pom pom 1 medium black pom Several small black pom poms 2 googly eyes Glue (we used a glue gun as pom poms can be a bit fiddly!)
Take your head piece (the medium black pom pom) and glue it on to the big red pom pom which will make your ladybug’s body.
Cover your Ladybugs red body in the small black pom poms, these will be your ladybug’s spots. To finish her off, glue on two googly eyes! how cute is this little one! we loved them so much we made a couple and a little paper leaf for them to sit on.