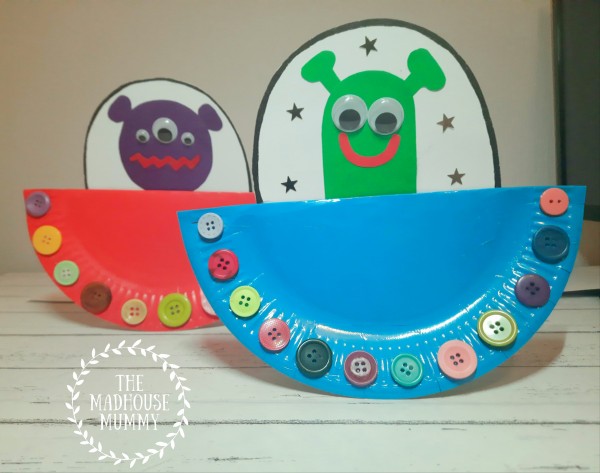
How fun is this cute little paper plate ufo craft?!
A lot of the crafts that we have been making lately have been holiday related. So today to break things up a little bit we’re sharing a just for fun craft that we absolutely love! This sweet little paper plate ufo craft is so simple to make and each one turns out beautiful and unique which makes them the perfect craft for groups!
Here’s what we used
Coloured paper plate
Card
Buttons
Googly eyes
Scissors
Glue
Stapler
How to make a paper plate ufo
Take the paper plate and fold it in half, add a staple just below the fold line on either side so that the paper plate stays in shape and can stand freely and rock from side to side!
Glue some buttons around the edge of the plate to make the ufo lights.
Cut out the dome shape of the cockpit and add your alien to the front of it. We cut our aliens out of coloured paper but you could use pens, paints or any method that you like!
Glue the two pieces together and your rocking paper plate ufo is finished!
How adorable is this little toilet roll astronaut craft? What with being at home so much over lockdown, my little guy has got fed up with playing with the same toys. So to pass some time we decided to make our own new toys. We made some bottle space rockets and these little space men. My son absolutely loves them, hes played with these so much more than any of the toys we’ve bought from the shops. He makes up his own little narratives and ‘whooshes’ them around the house. We even have little cardboard box space stations set up in different rooms. Why not have a go at making your own?
Here’s what we used
TP Roll
White Paper
Coloured paper
Eye stickers
Marker
Scissors
Glue
Take your TP roll and measure a length of paper the same height as it and wide enough to wrap around it. Glue the edges of your paper and secure it around your tube.
Cut out an egg shape for the face and decorate it with some eyes, a nose and a mouth. Then, take your face shape and glue it near the top of your TP roll.
Next you’ll need to make the springs for your arms and legs. To do this, take two strips of paper and glue them at a right angle as you can see above, then take turns accordian folding them one over the other before gluing them together at the end. You’ll need to make 4 springs.
Glue your 4 springs in position as arms and legs.
Cut out two over sized space mit shapes and two big space boots. Glue them in place on the end of your springs.
Finish off by adding some fun decorational buttons and strips and your astronaut is ready to be played with! Doesn’t he look fab?
Please note this post may contain affiliate links. If you click on any of the affiliate links provided and make a purchase I receive a small commission at absolutely no extra cost to you. This helps me to keep this page up and running and provide free content.