These washi tape Christmas cards are super simple to make yet still look amazing! They’re easy to adapt for children of all ages and preschoolers can enjoy making these as much as the older children. It’s a great little craft idea for schools, after school clubs and families and is very budget friendly too!
Here’s what we used
Green/yellow/white card
Various washi tapes
Scissors
Glue
How to make our washi tape Christmas cards
Start by taking a small length of tape that you will use as your tree trunk and stick it in place at the bottom of your card.
Snip off a length of coloured washi tape that stretches most of the way across the card. Stick it down in place just above the tree trunk.
Continue layering lines of washi tape decreasing the length of the strip each time to make a triangular Christmas tree shape.
Once you are happy with the size of your tree cut out a star and glue it down at the top of the tree
Add any optional decorations and then pop aside. Once dry, your card is finished and ready for a special message to be written inside. We just love these!
We gave these old wood slices a fun and festive makeover and don’t they just look adorable? These super cute wood slice snowman ornaments are small and lightweight and hang on the tree perfectly! They look super cute and effective and we can’t wait to make a whole snowman family for our own tree.
Here’s what we used
Wood slices
Acrylic paint pens
Foam
Ribbon
Glue gun
How to make our wood slice snowman ornaments.
Take your white paint and cover the front of your wood slice and then pop it aside to dry
Use your paint markers to give the snowman a face. We added two coal eyes, a little point carrot nose and a wiggly smiley mouth.
Add any additional decoration such as our foam hat, a bow, a bobble hat or whatever takes your fancy! We love using foam instead of paper as it tends to last better year after year.
Cut off a length of ribbon and tie it into a loop, glue the loop onto the back of your snowman and once dry your adorable Wood slice snowman ornaments are ready to hang and display!
These cute popsicle stick Christmas tree ornaments are so simple and easy to make and the look fab hanging on the Christmas tree too!
We just love how bright and colourful these look when they’re covered in Pom Pom baubles but you could decorate yours with anything you like! We love to see your creations, you can share them with me on social media; you can find the link to our Facebook and instagram at the bottom of this page.
Here’s what we used
Popsicle sticks
Acrylic paint pens (paints will work great too!)
Pom poms
Glittery foam
Ribbon
Scissors
Glue/glue gun
How to make our popsicle stick Christmas tree ornaments.
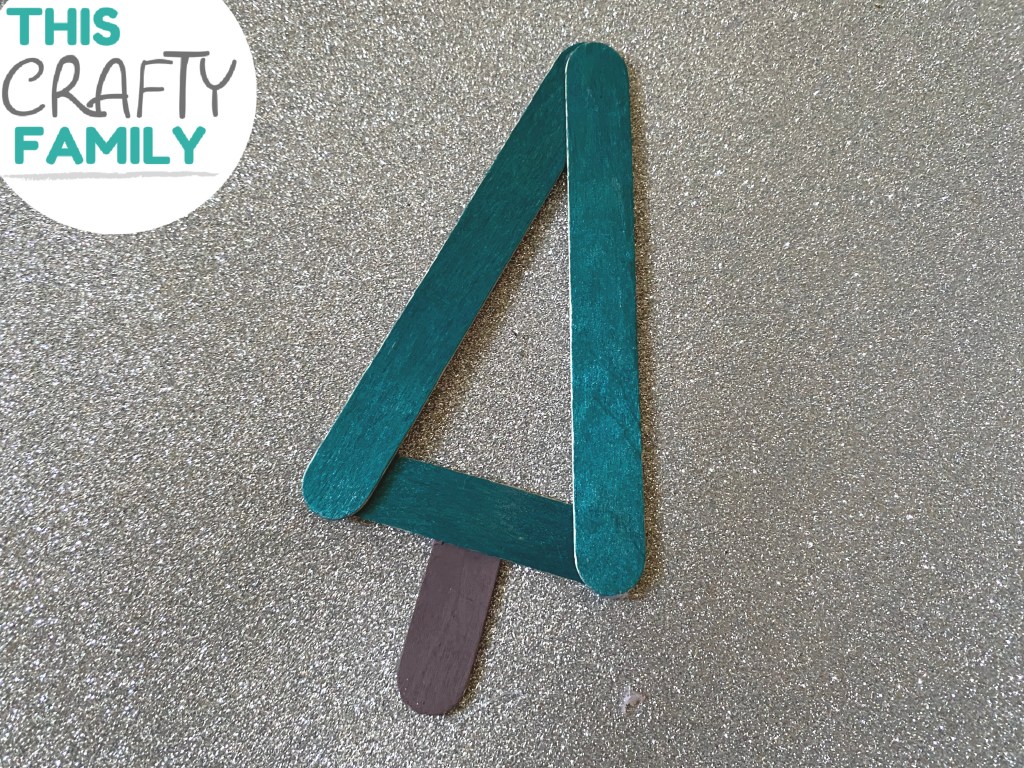
Start by taking your popsicle sticks and cutting them to the sizes that you can see above. You’ll need two full length sticks and one stick just over half the size with the ends cut to make the tree and an end section of stick to make the trunk. Then use your paints or markers to colour in the sticks before popping them aside to try.
Once your sticks are dry take the two full length ones and glue them together in a point, glue the shorter stick across the bottom to make the triangle shape of the trees and then finally add the final stick at the bottom to make the trunk.
Next decorate your popsicle tree ornament, we used colourful Pom Poms to make baubles but you can use anything that you like!
Cut out a glittery star for the top of the tree and stick it down in place
Finally tie a length of your festive ribbon into a loop and glue it down on the back of your ornament so that it can be hung on the tree. Once dry your ornament is ready to display! Aren’t these just the sweetest?
We’re finally on the last school term of the year here in the uk and that means one thing; Christmas is right around the corner and I’m not sure who is more excited, me or the kids! For our first Christmas craft this year we’ve been busy making one our favourites, these jazzy paper plate baubles. We love using these as part of our window displays, they’re easy to mass produce and each one turns out unique which means these are great to make and display for groups such as schools as well as at home!
Here’s what we used
Paper plates
Tissue paper
Red card
Tinsel chenille stem
Scissors
Glue
Glue gun / sticky tape
How to make our paper plate baubles
Start by decorating your paper plate to make the bauble. We glued several different coloured squares of tissue paper onto ours as they will be hanging in the window and tissue paper looks great in the light but you could almost anything. Some popular options include paints, pens and stickers.
Take your coloured card and cut out a trapezium type shape to make the top of the bauble and glue it in place on one side of the plate.
Take a length of pipe cleaner and twist it into a loop to make the ‘string’ for the bauble. Use a glue gun or tape to secure the loop to the back of the trapezium shape as above and once dry your baubles are ready to display!
We love to see your crafty creations, did you know that you can now share them with us on Facebook and instagram? You can find links to our social media’s down below!
Christmas is right around the corner and we’re officially at the stage where we make and post our Christmas cards! My son and I wanted to share this little design with you because it’s so simple but looks adorable too. We’ve been making these since he was tiny, I used to help him with the tricky bits but now he’s all grown up he barely even asks for my help. It’s amazing how fast he is growing and gaining independence. Sometimes I wish time would slow down a little but I’m so super proud of him! His little Christmas tree card designs really are adorable and we can’t wait to share them with loved ones.
Here’s what we used
White paper
Red card
Coloured markers
Decorations (we used sequins and buttons!)
Scissors
Glue
How to make our super simple Christmas tree cards.
To make our cards we did our design on white paper and then mounted it on to card but drawing straight on card looks fab too! Take a green marker and starting at the center near the top of your card draw a gradually snaking line downwards, getting wider as you near the bottom.
Cut out a star shape and glue it in place at the top of your tree line.
Add some colourful decorations all along the tree line. Then take a marker and add a little stump at the bottom of the tree.
We finished off by mounting our design onto some red card. Dont they look adorable? So simple too!
Please note this post may contain affiliate links. If you click on any of the affiliate links provided and make a purchase I receive a small commission at absolutely no extra cost to you. This helps me to keep this page up and running and provide free content.