Take your roll and chop it down to your desired height. Next take your pink card and cut out a strip the same height as your roll and wide enough to wrap completely around it. Glue the card around the roll.
From the same colour cut out two large pig ears and then cut two slightly smaller inner ears from a different shade of pink. Glue the pieces together to make the ears and then stick them in place inside the top of the roll.
Add two eyes on the front of the roll, just below the ears
Now make an oval snout and add two pink nostrils. Glue it on to the middle of the pigs face and use your marker to give the pig a mouth
Cut out a long thin strip with a point at the end to make a tail. Wrap the tail around a pencil to make it curl and then glue it onto the back of the roll to finish your pig! Isn’t he cute?
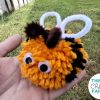
How cute is this caterpillar pencil pot craft? My daughter is at a stage where she really loves drawing and colouring but one thing she doesn’t love is when her pencils are constantly rolling off the table! This little cutie solves that problem and was super fun to make too!
Here’s what you’ll need
Cardboard rolls
Paints (optional!)
Coloured paper
Scissors
Glue
Glue gun or pva and pegs
Coloured markers
A pipe cleaner
How to make this caterpillar pencil pot craft
First start by taking your cardboard rolls and cutting them to different lengths. We placed our full sized roll in the middle and then cut the rolls either side descending in height.
Now it’s time to add some colour to the caterpillar. Paints are a great option but this time we decided to use coloured paper. We cut out a strip of paper the same height as the roll and long enough to wrap around it and then glued it on.
Repeat the previous steps until all rolls are colored, then take your glue gun and glue the rolls together to make the caterpillar shape.
Cut out and glue on two eyes and a nose. Then take your pipe cleaner and fold it in half before using the glue gun to secure it down inside the head section of the caterpillar to make the antennae.
Glue a little foot shape onto each body roll of the caterpillar then optionally mount your pencil pot on to some card. Once dry your super cute caterpillar pencil pot is finished and ready to use!
With it being so close to Easter bunnies are a particularity popular theme right now. My son loves rabbits anyway, his Grandma has two little ones that he absolutely adores. However, I’m pretty sure that all this bunny mania has sprung from the fact that he just can’t wait for the Easter bunny to come and hide some eggs! He’s forever asking how much longer he has to wait, so for now were busy filling the time with some Easter themed crafts – like these extra cute DIY bunny corner bookmarks.
You will need
Coloured or white paper for your bunny
Pink, orange, white and green paper
Black marker
Scissors
Glue
First of all you will need to make your corner bookmark. If you haven’t made one before you can find a guide on how to fold one here.
Take your bunny coloured paper and cut out two long ears. Now, take your pink paper and cut out two slightly smaller inner ears and a triangle for the nose.
Glue your bunny’s ears down on the inside of your bookmark and the triangle nose on the bottom point as above.
Use your black marker to draw on two eyes and some whiskers.
To make your carrot cut out a rounded orange cone shape and draw on some lines. Next cut out the curvey shape of the greenery as seen above. For the tail cut out a white circle.
Glue down the bunny’s tail on the top point of your bookmark. Then finish off by gluing down the carrot on the back of your bookmark under the bunny’s nose. How cute does your bunny bookmark look? We think they’re adorable!
We’d love to see how yours tuned out, did you know you can tag me on Facebook?
Today is world book day! This week we have been extra busy coming up with some fun book themed crafts. We love to read in this house and so we also love to make corner bookmarks to keep track of where we are in our books. We have a box full of different designs; some that we have seen on pinterest and some that we have came up with ourselves. However, i think these cute little DIY Gruffalo corner bookmarks -inspired by Julia Donaldson’s Gruffalo series might just be my new favourite.
You will need
Brown paper
White paper
Orange paper
Black and green markers
Scissors
Glue
To start with you will need to make your bookmark. If you haven’t made one before you can find a guide to folding origami corner bookmarks here.
To start with, cut out two ears the same colour as your bookmark. Next, you will need to cut out two white horns and two white circles for outer eyes. For the inner eyes, cut out two slightly smaller orange circles and use your black marker to dot on the pupils.
Glue your ears and horns down in place on the back of your bookmark then position and stick the two eyes down on the front as shown above.
Use your black marker to draw on a nose and a mouth. Then, use your green marker to dot the Gruffalo’s green wart on his nose. Finish the Gruffalo’s mouth but cutting out two tusk like teeth and some smaller normal shaped teeth. Glue them down in place and put aside to dry.
Finally, cut out an orange square and glue it down inside your bookmark as you can see above. Your DIY Gruffalo bookmark is finished! How cute does it look?!
Please note this post may contain affiliate links. If you click on any of the affiliate links provided and make a purchase I receive a small commission at absolutely no extra cost to you. This helps me to keep this page up and running and provide free content.