This cute paper stingray craft was perfect for my ocean obsessed son, making them is a great way to kill an hour and then they provide many more hours of fun as a cute handmade toy. The best part is these little stingrays are so simple to make and only requires cheap basic materials too!
Here’s what we used
Coloured card
Clean Toilet roll tube
Sticker eyes
Red marker
Scissors
Glue
How to make this paper stingray craft
Take your stingray coloured paper and cut out a circular shape with a slightly narrower curve on one side to make the nose.
Add some double sided tape to the top part of the toilet roll and stick the paper onto the toilet roll so that the roll is beneath the nose and stretching down the body
Cut out a long thin point to make the stingrays tail and then stick it in place on the underside of the stingray’s body.
Add two eyes and a cute smiley mouth to the nose of your stingray.
And then finally add any optional decorations; we cut out several spots and glued them onto ours! Once totally dry the stingrays are finished and are ready to be played with or displayed!
How cute is this caterpillar pencil pot craft? My daughter is at a stage where she really loves drawing and colouring but one thing she doesn’t love is when her pencils are constantly rolling off the table! This little cutie solves that problem and was super fun to make too!
Here’s what you’ll need
Cardboard rolls
Paints (optional!)
Coloured paper
Scissors
Glue
Glue gun or pva and pegs
Coloured markers
A pipe cleaner
How to make this caterpillar pencil pot craft
First start by taking your cardboard rolls and cutting them to different lengths. We placed our full sized roll in the middle and then cut the rolls either side descending in height.
Now it’s time to add some colour to the caterpillar. Paints are a great option but this time we decided to use coloured paper. We cut out a strip of paper the same height as the roll and long enough to wrap around it and then glued it on.
Repeat the previous steps until all rolls are colored, then take your glue gun and glue the rolls together to make the caterpillar shape.
Cut out and glue on two eyes and a nose. Then take your pipe cleaner and fold it in half before using the glue gun to secure it down inside the head section of the caterpillar to make the antennae.
Glue a little foot shape onto each body roll of the caterpillar then optionally mount your pencil pot on to some card. Once dry your super cute caterpillar pencil pot is finished and ready to use!
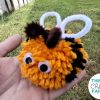
This super cute pom pom reindeer ornament is so simple to make and looks adorable too! it’s never too early to start Christmas crafting, We’ve had a quiet couple of days at home to try and get over a cold and to keep ourselves busy we’ve been bust trying out our new pom pom makers! i just love how this reindeer turned out and were currently in the process of making each of Santa’s reindeer as part of a cute Christmas display that we have planned. If you and your kids have go at making one we’d love to see how it turned out, did you know we’re now on Facebook? you can share pictures with us there.
Here’s what we used
Pom pom maker (optional)
Brown yarn
Brown pipecleaners
Googly eyes
Red pom pom
Tacky glue/glue gun
How to make a pom pom reindeer ornament
Start by making a large brown pom pom. If you haven’t made one before you can find a quick guide here. You don’t need a pom pom maker to make a cute pom pom!
Tie a yarn loop and glue it down into place inside the top of the pom pom
Take a pipecleaner and fold it in half to create the top antler. Twist it secure about 2-4cm from the bend. Pinch a second antler on either side and twist them together at the base to secure. Part the yarn of the pom pom and glue the antlers into place either side of the loop at the top of the head
Glue on two Googly eyes and a pom pom nose and your pom pom reindeer ornament is finished!
We had so much fun making this adorable paper plate mouse craft! They were easy enough for my little boy to make by himself and my toddler enjoyed making these with a grownup. I love a sweet and simple craft idea that can be adjusted so that both of my children can join in and this little craft was perfect!
Here’s what we used
Paper plates
Colored paint and paintbrush
Pom Pom
Pipe cleaner
Googly eye
Scissors
Glue
How to make a paper plate Mouse
Take the paper plate and coat it in the colored paint before putting it aside to dry.
Cut out two equal circles to make the ears, glue one to the front and one slightly further forward on the back. Glue down a Googly eye and a pom pom for the nose.
Cut out three thin strips of paper for the whiskers and glue them down in a triangular shape. Then take the pipe cleaner and twist it around a pencil leaving a small length at one end straight. Use this length to glue the pipe cleaner tail on the inside of the paper plate. once dry your paper plate mouse is finished!
How fun are these paper plate rainbow fish? We had so much fun making these to add my kid’s animal wall! Both my children love watching ocean documentaries and learning about the various creatures big and small that live under the sea. Whales are usually the favourite but recently my son’s grandfather was given an old 3D tv and my little guy loves to watch the different coloured fish swimming around in front of him. So inspired by that we decided to create our own Rainbow coloured fish and we just love them!
Here’s what we used
Paper plates
Tissue Paper
Coloured paint and paintbrush
Wiggly eye
Pink paper
Scissors
Glue
How to make a paper plate rainbow fish
For each fish you will need one and a half paper plates. Coat these plates in the chosen colour paint and pop aside to dry.
Once dry take your half paper plate and cut in in half to create two triangles. Glue one triangle onto the back of the paper plate to make the tail. Then, take the other triangle and cut it in half downwards from the point to give you two smaller triangles. Glue one of these triangles on an angle at the top of the paper plate and one at the bottom to make the fins.
Cut out several tissue paper circles to make the scales and glue them over the back 2/3rds of the fish’s body
Add a Wiggly eye and a cute heart shaped mouth and once dry the paper plate rainbow fish is finished!
Please note this post may contain affiliate links. If you click on any of the affiliate links provided and make a purchase I receive a small commission at absolutely no extra cost to you. This helps me to keep this page up and running and provide free content.